All You Need to Know About Interior HDR Photography
February 06, 2016

Pro photographer Tyson Robichaud explains why you can't do without HDR for interiors.
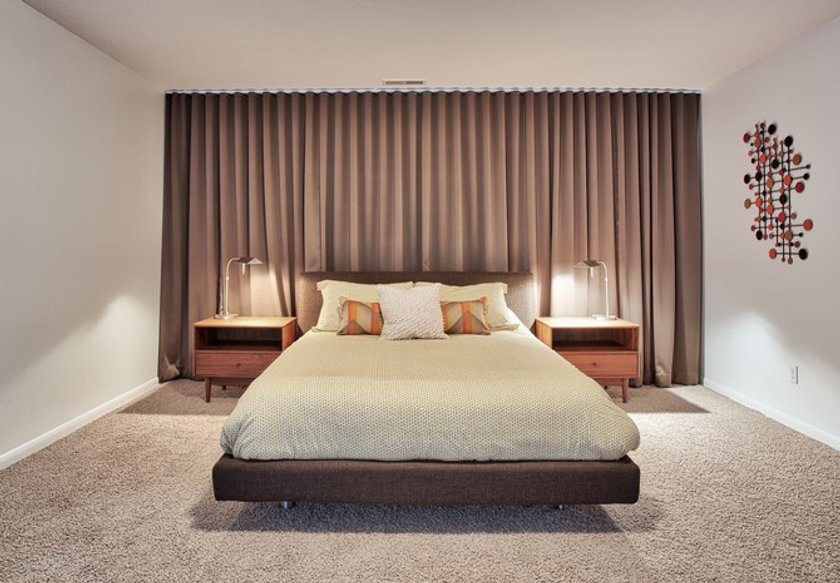
Photographing interior spaces can seem like a daunting task to people who aren’t familiar with the techniques. There are many reasons why photographing interiors is challenging, including not being able to fit the scene in your frame, bad lighting, and perhaps most importantly, not being able to capture the scene realistically. Balancing ambient light and artificial lighting is crucial for achieving realistic interior photos, especially when using HDR techniques, as it helps blend natural and existing light sources for a more natural-looking result. But photographing interiors of buildings can be very simple if you master the art of interior HDR photography.
Today, there are simply so many photographers trying to make a name for themselves by experimenting with new techniques that it’s become imperative for every photographer to step out of their comfort zone. This is especially true if you’re working in an industry like real estate where photography is such a big part of the job. Your photos have to showcase the properties you’re selling and attract potential buyers. They also have to be realistic so that your reputation doesn’t get tarnished when someone visits a property and it’s nothing like you showed in the pictures. This is why HDR real estate photography is such a big deal and why you should seriously be using it to reach your clients.
What is HDR Photography
HDR photography, or High Dynamic Range photography, is a powerful technique that allows photographers to capture a much broader spectrum of light and detail than traditional photography methods. Instead of relying on a single exposure, HDR photography involves taking multiple shots of the same scene at different exposure levels—typically at least three exposures: one for the highlights, one for the mid-tones, and one for the shadows. These bracketed exposures are then merged using specialized HDR software, such as Aurora HDR, to create a single, well balanced image that showcases the full range of details present in the scene.
This approach is especially valuable in real estate photography and architectural photography, where interiors often feature a mix of bright windows, shadowy corners, and complex lighting. By using HDR techniques, professional photographers can ensure that every detail—from the sunlit view outside a window to the subtle textures in darker areas of a room—is captured and visible in the final HDR image. This results in HDR images that are not only visually striking but also realistic, helping potential buyers get an accurate sense of the space.
The process of creating an HDR image requires technical precision. Photographers must use a camera capable of shooting bracketed photos, often mounted on a tripod to avoid any movement between shots. Each exposure is carefully set to capture different exposure levels, ensuring that no detail is lost in either the brightest or darkest parts of the image. Once the multiple shots are captured, the merging process in HDR software combines the best elements from each exposure, using advanced tone mapping and blending algorithms to produce a high dynamic range image that looks natural and inviting.
Professional architectural photographers rely on HDR photography to deliver images that stand out in the competitive real estate market. The ability to capture the full range of light and detail in an interior space means that every photo can present a property in its best light, making it more appealing to potential buyers and clients. Whether you’re photographing interiors for a real estate listing or capturing the unique design of an architectural project, mastering HDR techniques is essential for achieving professional results.
In summary, HDR photography is an indispensable tool for anyone serious about photographing interiors. By understanding how to capture and merge multiple exposures, and by using the right HDR software, photographers can create stunning HDR images that reveal the true beauty and detail of any interior space. This not only enhances the visual appeal of your photos but also helps your work stand out to potential clients in the real estate and architectural photography industries.
The importance of HDR
HDR stands for High Dynamic Range, and HDR photography deals with increasing the overall dynamic range of your photos. Dynamic range is the variation between the extreme bright areas and extreme dark areas in a scene. For example, on a bright sunny day with a clear sky, the brightest point will be the sun and the darkest point will be wherever the most shadows are cast or where the sunlight doesn’t reach at all. HDR techniques help preserve details in shadow areas, ensuring that both highlights and dark regions are well-balanced in the final image.
The reason why HDR is so popular for interior photography is that you can use it to capture a lot more detail in your scenes. The best camera sensors today can capture about 15 stops of detail. The human eye, in comparison, can see more than 20 stops. This means that a photo that isn’t HDR can’t showcase a scene in a realistic manner, which is important when it comes to interior photography. Using HDR techniques is essential for achieving optimal results in interior photography.
How to shoot interior HDR photography
The first thing you need to understand is how HDR photography works. An HDR photo is essentially a combination of multiple photos that are taken of a single scene but at different exposure settings. Setting a correct base exposure is crucial for capturing mid-tone details and ensuring consistent camera settings during bracketing, which helps facilitate seamless HDR merging.
The final result is a photo with much more dynamic range than any single exposure would allow. There are, of course, some ways to achieve an HDR effect with image editing programs if you don’t have the time to take true HDR shots or didn’t notice that you needed to take multiple exposures.
For those situations, Luminar is an excellent program that can give HDR effects to your images. Post processing plays a key role in refining HDR images, correcting issues, and achieving a natural, balanced look.
If you’re interested in taking proper HDR photos, however, here’s a step-by-step tutorial to help you out:
Turn your camera’s mode dial to M to shoot in manual mode. This is important, as you don’t want to rely on your camera’s auto exposure functionality. Some photographers prefer using aperture priority mode to maintain a consistent depth of field in their HDR shots.
Select the aperture you wish to use. For interior or real estate photography, use a deeper depth of field to keep everything in focus. An aperture of f/8 to f/11 should work well. Make sure your camera settings, including aperture and ISO, remain consistent for all exposures to ensure uniformity in your final HDR image.
Set your ISO to a value you’re comfortable shooting with.
Set your white balance manually to maintain color consistency across all exposures during bracketing and HDR processing.
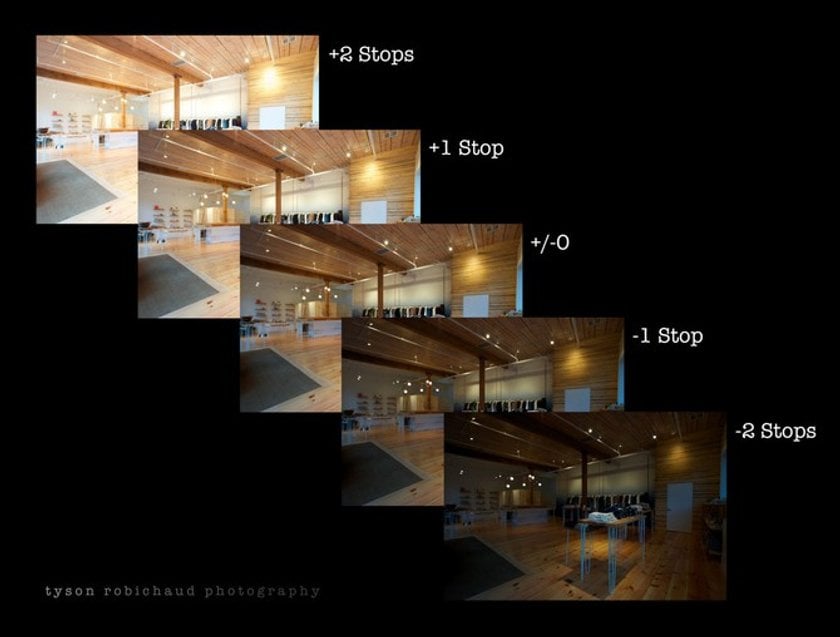
Now all you have to do is adjust your shutter speed for each photo. You should take at least three exposures. Each shot should be carefully composed and exposed to capture the full dynamic range of the scene. One of these should ensure that your highlights are exposed properly and aren’t blown out, so any extreme white parts of the photo should have noticeable detail in them. One should ensure that your shadows are exposed properly, so any dark areas should have detail in them instead of appearing black. And the last exposure should be an overall balanced exposure that basically keeps the detail in your mid tones.
Once you have all these images, just download the best HDR software you can find and let it do the work. Most HDR editors have presets that can give your photos different looks, but you can also edit your RAW files to your taste and adjust the final HDR image manually if you want.
Before you take your exposures
Before you go ahead and take your photos, make sure you have the right lighting equipment to handle challenging lighting conditions and achieve proper exposure in your interior shots. Here are some tips to help you make the most of your interior shots.
- Use the right lens
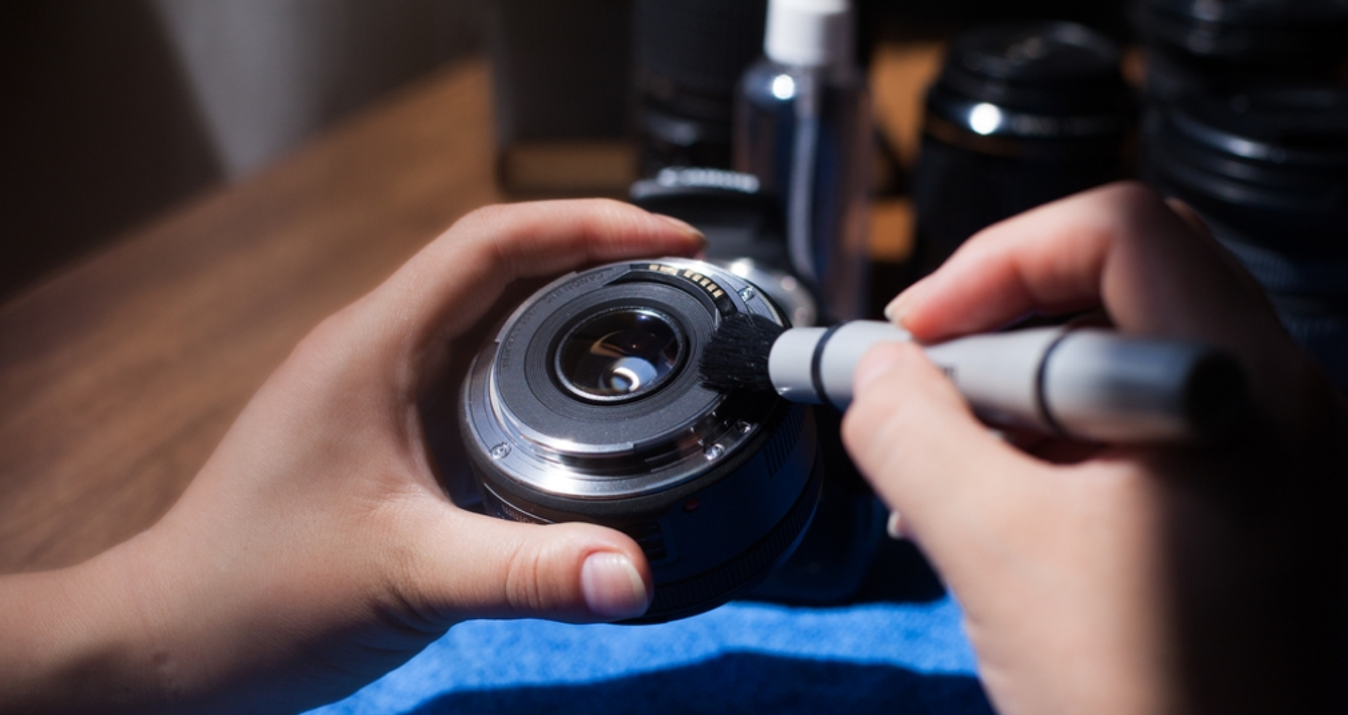
If you want to take photos to show a complete interior space to clients, then you should be using a wide-angle lens. Try to get a lens with a wide aperture so that you can take photos in low light as well without using a tripod.
- Experiment with framing
Just because you’re taking interior photos doesn’t mean that you shouldn’t do some interesting framing. Take inspiration from the work of famous architecture photographers like Nick Guttridge and Koen Van Damme to see what types of framing they incorporate into their interior photos.

- Shoot in RAW
It’s very helpful to take all your photos in the RAW format. Shooting in RAW images provides more flexibility and detail for HDR processing, as RAW images are uncompressed and retain more information essential for high-quality HDR photography. This will allow you not only to edit your photos before taking them into an HDR editor but will also let you edit your HDR images much better without destroying image quality. To edit your RAW files, we recommend using software that’s simple, straightforward, and has a blend of presets and complete manual control to really allow your creativity to shine. Some HDR software can merge multiple exposures into a single .dng file, which can then be further edited just like any other RAW image. Luminar is a great option for this purpose, and the free trial can help you be sure that you aren’t wasting your money and time before you decide to buy it.

After you’ve taken your exposures
A well-structured editing workflow is essential for processing HDR images efficiently and achieving high-quality results.
There are some crucial things that you need to understand before creating your final image in an HDR editor. When blending exposures, consider using luminosity masks to selectively control highlights and shadows, ensuring a balanced and well-exposed final image.
- Don’t go overboard
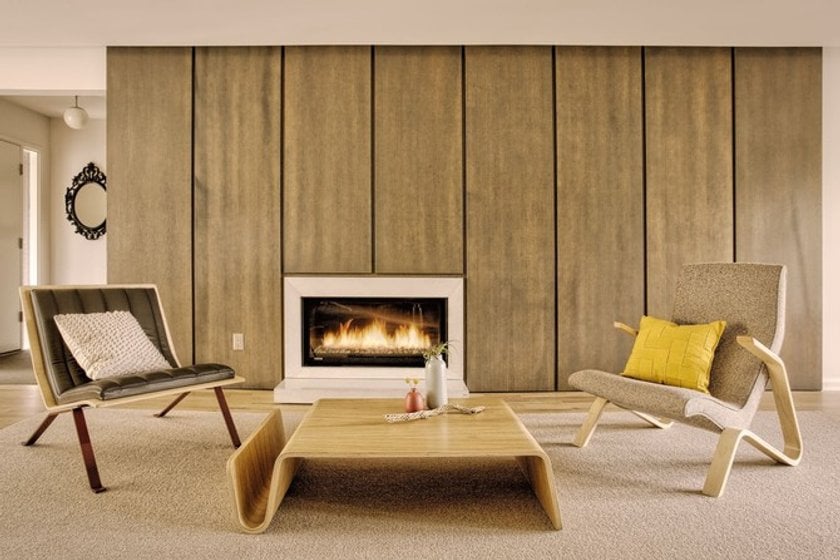
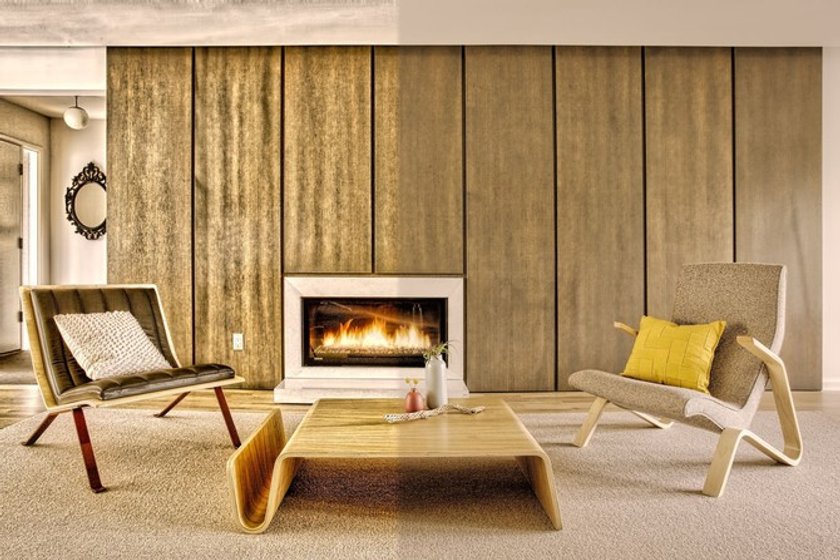
The first and most important thing to keep in mind is that it’s easy to go overboard with interior HDR photography. If you don’t create a nice balance between the different exposures of your scene while blending them, the photo can end up looking fake and unappealing.
- Try to use actual HDR
It’s always better to take true HDR photos rather than try to give your photos a fake HDR look with a photo editor. However, that’s not to say that these kinds of effects can’t help out. There are some very capable photo editors that make subtle changes to your photos and make them look a little more HDR-like.
- Know your audience
You can give an HDR image various looks. You can make it very realistic or very dramatic depending on what you want to achieve. If the purpose of your interior photography is to create dramatic, striking images for online platforms or exhibitions, then you can use your HDR editor to create that kind of artistic look. If, however, your work is more related to real estate or photographing your own designs to present to potential clients, then you should try and bring as much realism as possible to your photos. So before you jump into the editing process, be very sure of whom you want to see your work and how you want your work to influence them.
With all of this information on the importance of HDR photos and how to take them easily, you should be ready to take your interior photos to the next level. Whether you’re a hobbyist photographer who simply likes to take architecture and interior photos or you’re a real estate photographer, these tips will help you get the right amount of detail in your photos. If you’re ready to take the next step with your interior design photography, employ the magic of HDR with the best HDR software programs available and see how easy it can be to take good-looking photos of interior spaces!
Well, that's my approach when integrating HDR processing into my interior shooting. I hope that it has helped and would love to hear from you.
Tyson Robichaud is a professional photographer and photography review blogger from Portland, OR. He runs both TRP Photography as well as around after his two young kids.