
November 26
14 min. to read
How To Blur Background In Photoshop In Just A Few Steps
Blurring backgrounds in Photoshop is done in 4 minutes and 4 steps. Next, in this article, we'll go over each one so that even beginners can turn their photos into masterpieces.
Why Background Blur Works So Well In Photos
 Background softness mimics what happens when a camera uses a wide aperture. Objects close to the focal plane remain sharp, while the foreground and background merge into soft colors and light. Our eyes are accustomed to this effect, so when the subject of a photograph remains sharp and everything else is blurred, it looks like a layer of reality has been removed.
That technique is most effective when used with photos of people or objects. With blur and sharpness, you can become a master of controlling the viewer's visual perception, making them see the image you want them to see. A soft blur separates a person from a busy street, hides cluttered shelves, or turns office chaos into a unified play of several objects.
However, defocusing is not a superhero that could solve all the problems of a scene. If the source material looks bad or unusual, the editor could make it worse. That's particularly true in architectural photography, where even the finest line is important. Blurring would ruin the original concept, rendering the creative work completely useless.
Quick Method: How To Change The Sharpness Of The Background Display
Beginners who are just starting with image editing often wonder what does the blur tool do in Photoshop and how to use it the right way. In the following guide, we will walk you through everything step by step—from working with layers to selecting objects accurately and hiding unwanted details.
Step 1: Preparation For Creation
Get Photoshop for your work device before you start creating. It doesn't matter if it's the full version or portable, nor does the year of release matter, because defocus is the main tool and is present in all Adobe editors.
Select the application you are interested in and open it in the program. Duplicate the layer (default Ctrl/Cmd + J), but don't delete the first one that appears. This is required to maintain control over the situation and track the changes made.
Keep the names and positions in order. A layer that has fallen from the sky could ruin the composition and become a snowball that will collect your other mistakes. If, for some reason, you don't want to use Photoshop, you might want to consider Luminar Neo or other editors.
Step 2: Select The Subject
Editors joke that they are real hypocrites because they often create new masks. In fact, it is a universal tool that can be used for any effect on stage. Before you learn the secret of how to blur out background in Photoshop, go to the “Selection” menu and select “Object.”


In the latest versions of the editor, this command usually works well with people, animals, and clear objects, even without human intervention.
Zoom in and adjust the selection using “Select” and “Mask”. Use the Refine Edge brush around hair, fur, and transparent areas such as veils or glasses. If you are wondering how to remove object in Photoshop, you can do this using the “Delete” button on your keyboard or manually using the layer system. Don't worry about pixel-perfect selection of small strands, but aim for a clear edge that looks realistic when using the inspection tool at 100%.
Step 3: Build A Mask And Add Blur
After activating the selection tool, add another mask layer at the defocus level. You can select the object manually or automatically so as not to affect the surrounding pixels. Click on the mask icon, then use the Ctrl/Cmd + I key combination. This will separate the subject from the rest of the image, leaving the rest ready for defocusing. If needed, you can use the background adder tool to create a special atmosphere or mix textures.
Once you have made your selection, go to the “Filter” tab, select the “Blur” option, and then “Gaussian Blur.”  You can adjust the effect using the slider. Overdoing it and swiping all the way to the right will turn the entire scene into a haze.
Step 4: Refine The Transition
The boundary where a sharp object meets a blurred background creates the entire effect. A small amount of blurring will not be a major change, but it will fundamentally alter how the human eye perceives the image. The border, which is as thin as surface tension, becomes almost invisible due to the mixing of pixels.
When the figure appears monolithic, it is possible to fragment it using white and black colors. To do this, switch to a soft brush, create a new layer, and make adjustments. Using the layer transparency adjustment system, you may carefully clean up the blending areas while preserving the areas where precision is important.
More Natural Ways To Make A Blurred Background In Photoshop
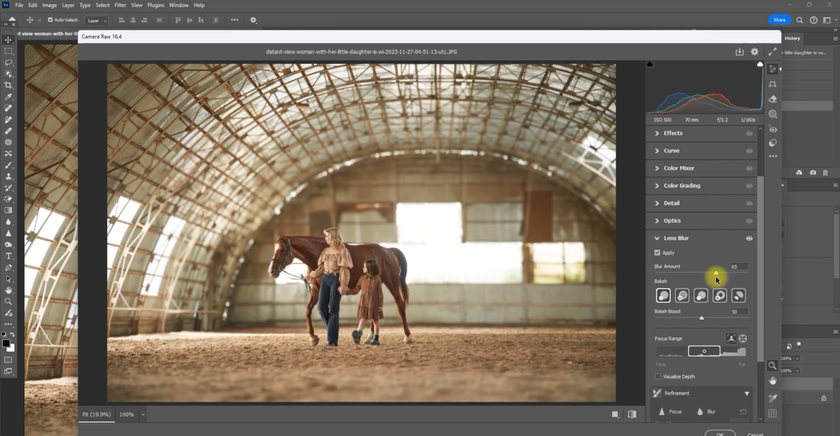
We have already figured out how to make a blurred background in Photoshop using layers and “Gaussian blur”. This is the shortest and most logical path you take, but what if you need to look deeper behind the screen? Exploit the full potential of blurring with the Lens Blur, Field Blur, and Title Shift tools. Their principle of operation is more complex, but it is as close as possible to how a regular camera works.
Visual storytelling is controlled through a depth map. By placing the object on one layer and the background on another, you can load this map into the “Lens Blur” tool so that Photoshop knows which areas should remain sharp and which should be softened.
We've put together a quick comparison of background softness tools so you can find the one that will make your photos shine:
Gaussian Blur. Quick and easy blurring across the entire masked area. Great for quick editing and social media images.

Lens Blur. Imitates camera optics and depth maps, useful for portraits and scenes with a clear distance between the foreground and background.
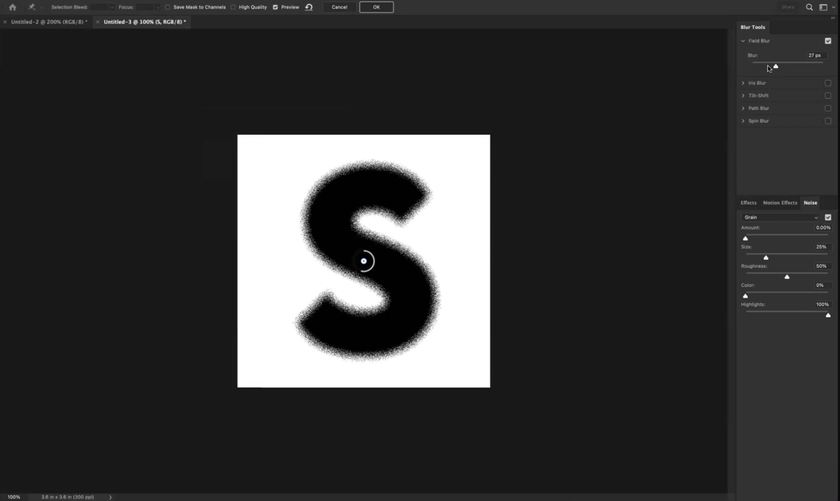
Field Blur. Adds pins with varying degrees of blur, well-suited for creative gradients and selective softness across the frame.
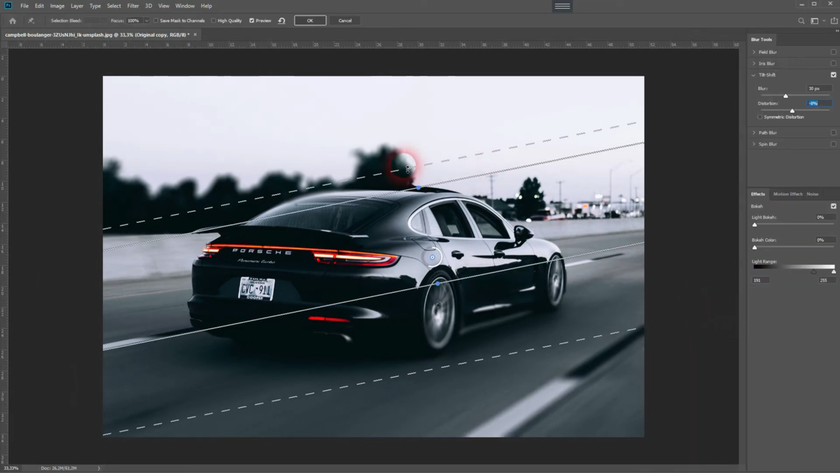
Tilt-Shift defocus. Imitates a tilt-shift lens, creating a focus strip and strong blurring at the top and bottom, often used for a “miniature city” effect.


A highly sharpened or noisy background may appear aggressive after softening. Should the original photo already have a grainy photo filter, look into reducing the value on a separate layer before applying defocusing.
Comprehensive Photo Editing Before Applying Blur
 alf of the success of the result depends on the actions that were performed on the image before processing. There is no place here for rituals or multi-layered underlays that level out the entire problem area. Just change some parameters to achieve a pleasing image.
We have already mentioned how harmful excessive details, such as noise, and how to make background blurry in Photoshop can be. But there are pitfalls in this process you need to be aware of to avoid a disastrous outcome. When you blur noise, spots turn into splashes of color that stand out on flat surfaces, such as the sky or walls. If you are unsure, you can read the article on how to reduce grain in Photoshop in a few minutes.
When there is a slight blurring of movement throughout the entire photo, it might be due to a slight camera shake during shooting, which causes the scene to shift. That minor annoyance can be very distracting if not corrected.
To fix this, convert the image to a smart object, then add a filter that affects the photo shake effect. Depending on the version, its location and name will change, so you'll have to use your ingenuity. Once you find the right level of alignment, you may apply defocusing.
Three Common Mistakes When Editing Clarity
 When you start learning how to blur the background in Photoshop for portraits or product photos, three problems tend to recur—and they're all easy to spot if you know the signs.
Blurring parts of the subject. An incomplete selection of the object or a hastily made mask can ruin the overall picture. Don't rush the outline, and if you use an automatic solution, check the fruit before picking it.
Halos around the subject. Hard edges and intense feathering are not good friends. When they meet, they cause noticeable halo edges at the junctions. Go back a step, repeat the process, but use a brush on the mask with low opacity.
No depth, no meaning. The degree of softness should not remain at the same level. If all elements in the scene behind the main object are evenly distributed, it will simply look flat. Use “Lens Blur” with a depth map or “Field Blur” with multiple points so that the closest background elements remain slightly sharper and the distant ones more defocused.
Photo editing it's a comprehensive approach to cultivating results that requires a steady hand and a clear understanding of the actions involved. Use advanced tools like Luminar to improve quality without spending time learning individual tools.
Building Your Own Go-to Blur Workflow
Finding your signature style can only be achieved through countless trials and errors. Whether you're trying to figure out how to blur background in Adobe Photoshop or something more global, you need to take several steps to achieve more. Combine methods, share your results on social media, and join communities. And on days when you want to do less technical work, you may even prefer to have software such as Luminar Neo handle the background haze in the first pass and then refine the result in Photoshop.
 >
>
